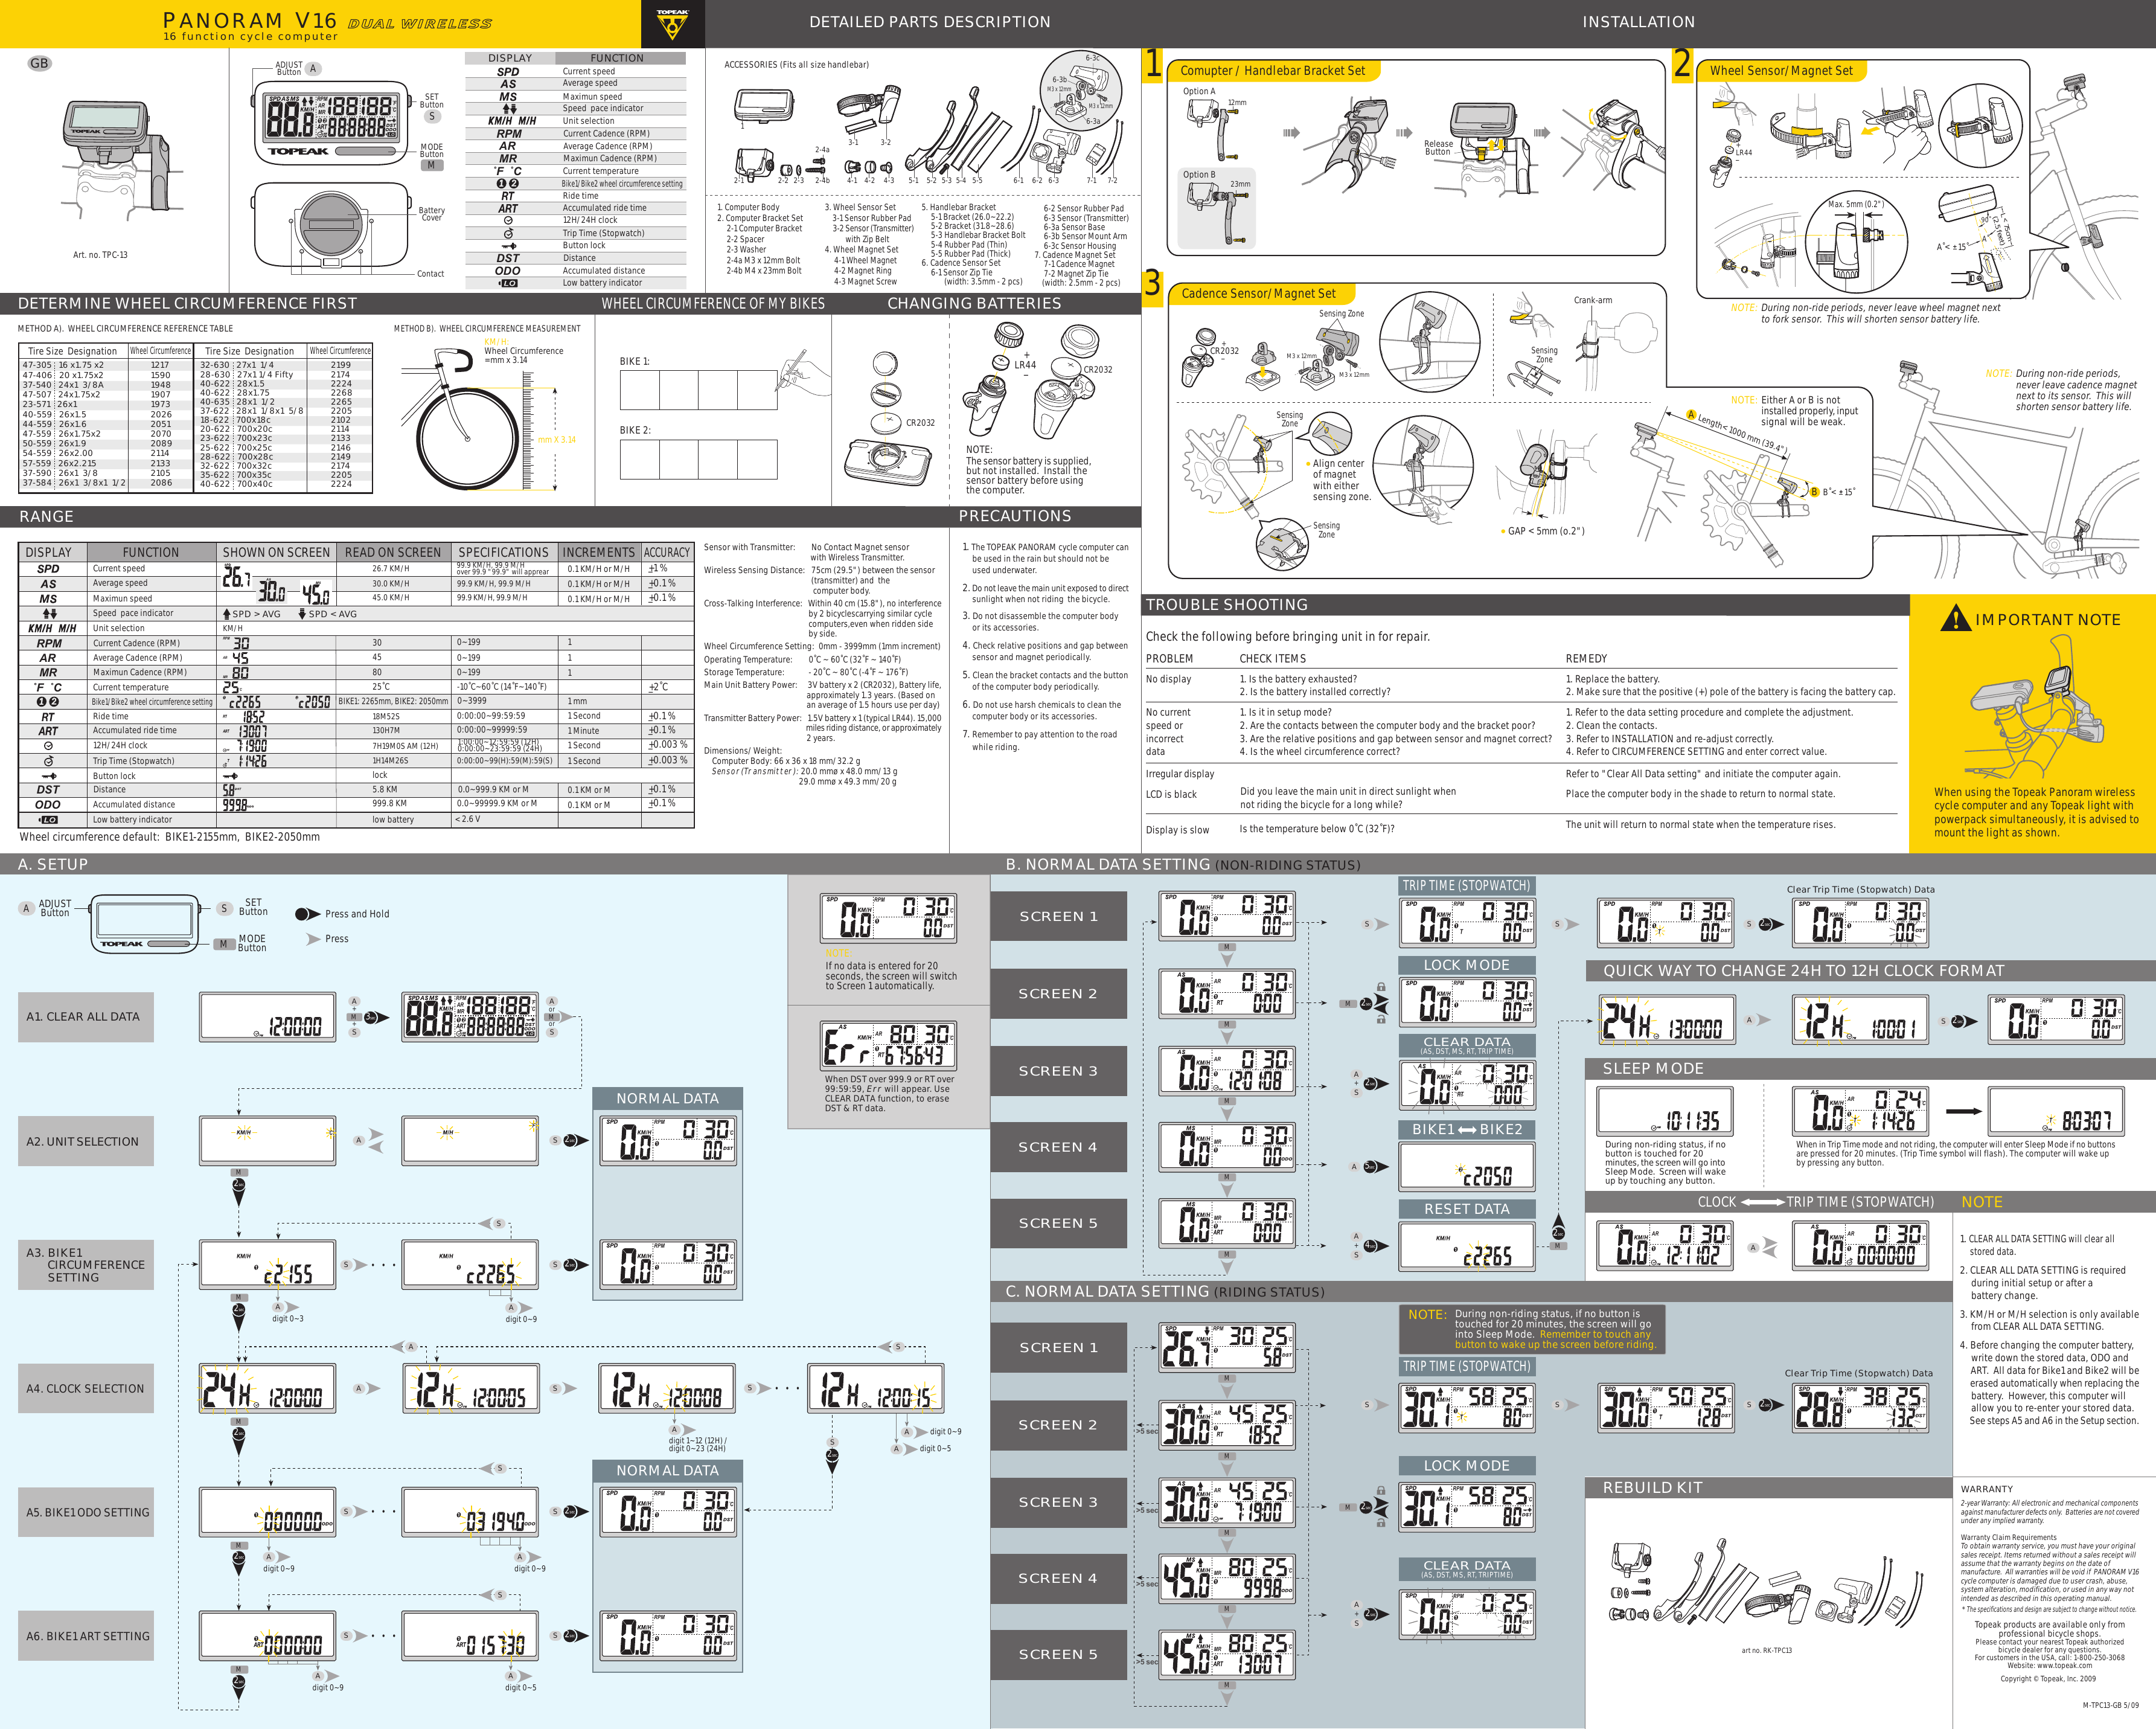

(The original factory-attached battery may be shorter than this period due to shipping and storage time. ] 01 Km or Miles 0-99999Km or Miles 1 Km or Miles 0:00'00'- 9:59' 59' 1 Second 0:00' 12:59' 1 Minute Remark: All functions data are updated once a second. This computer can be used in the rain but should not be used under water. Replace with a new LR44 (cross reference type A76, AG13 or V13GA) computer with the positive (+) pole toward the battery cap. Replace battery with a new one within 2 weeks after the symbol was appeared, otherwise incorrect data may be display when the battery voltage is too low. The computer can stand on the desk and act as a normal clock when you bring it indoors. To remove the main unit, press down on the lock lever of the bracket then pull the main unit forward and off. Mount the main unit onto the bracket by sliding it from front to rear till it clicks into position. Secure excess wire near the fork crown by wrapping it around the front brake cable or by bending it back and forth and securing it with cable ties. Make sure the sensor cable is loose enough for the handlebar to turn freely before tightening the cable ties. It can lock up the main unit, ensuring that the main unit will not drop out while riding. ] Attach the BRACKET to the handlebar and fit the RUBBER PAD between the handlebar and the band of the bracket.

B0) on one spoke of the front wheel and let the magnet face the sensing zones. ] Mount the SENSOR with 2 cable ties on the front fork with the RUBBER PAD, and let the sensor face the spoke, do not tighten the cable ties before the sensor is placed in the right position.


 0 kommentar(er)
